
Layer-by Layer — Print Smart:
Simple Design Tips for Intricate 3D Printing
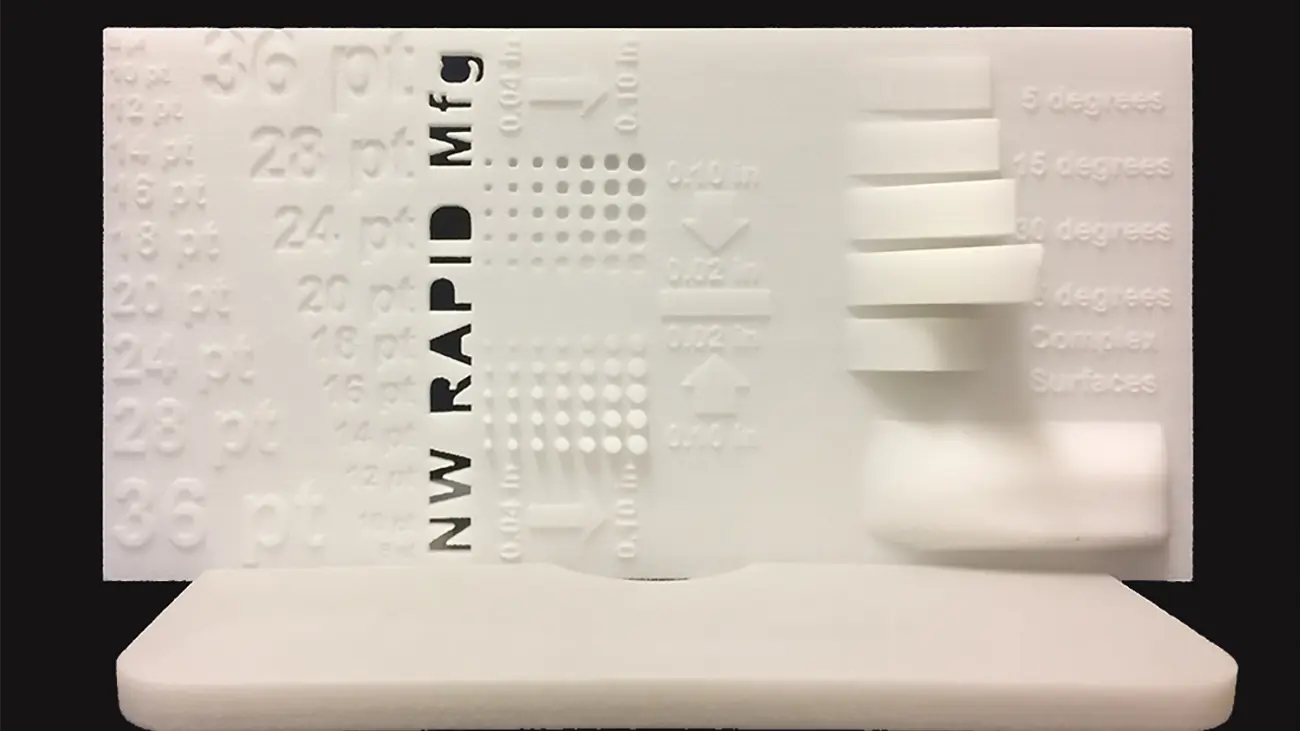
One of the powerful aspects of 3D printing is its ability to print almost anything. You're not as limited as with traditional manufacturing practices. However, not every design is perfect for 3D printing on the first try. To ensure a more straightforward printing process, follow these design guidelines for SLS:
Does your design include writing?
- Use a Sans Serif Font like Arial. These fonts tend to be without frills and will print much clearer.
- Bold all your text. You want it to stand out!
- Choose a large font size, but not too large. Keep your font sizes between 18 and 26 points.
- In your CAD program, ensure that recessed text is at least 0.8 mm deep and raised text is at least 0.5 mm.
Does your design include circular holes?
- If the hole is in vertical build orientation, the diameter needs to be at least 1.5 mm.
- The diameter should be at least 2.0 mm if the hole is in horizontal build orientation.
- The best resolution occurs when the part is designed with holes in vertical orientation and the surrounding area isn't too thick.
General tips to keep in mind.
- Your design's walls need to be at least 1.0 mm thick.
- If you orient thin walls for plane-by-plane building, you'll improve the machine's accuracy and resolvability.
- Any pins should have a minimum diameter of 1.0 mm, though they can be in either vertical or horizontal build orientation.
- Gears can print extremely well if the distance between each tooth is between 0.5 and 1.0 mm. You'll also want to make sure the shaft clearance is 1.0 mm.
These guidelines will help your part print well the first time. Some changes can be made after printing using more traditional manufacturing tools. Of course, if your design needs additional help, the engineers at NW Rapid will work with you to create the final product you want and need.
For more information, please don't hesitate to contact us at or request a quote and upload your file today!